| Anchor | ||||
|---|---|---|---|---|
|
| Excerpt | ||
|---|---|---|
In this article, you will learn how to enable and manage in-app payments in Komet Sales to streamline your payment process and make your customers' lives easier.
|
Table of Contents
| Table of Contents | ||||||
|---|---|---|---|---|---|---|
|
What do I Need to Enable In-App Payments?
To have an easy time with creating a stripe account and enabling in-app payments in Komet, you will need to have the following information at hand:
Business Information:
Legal business name.
Type of business entity (e.g., corporation, LLC, sole proprietorship).
Industry type or nature of the business.
Business address and contact information.
Tax Information:
Employer Identification Number (EIN) for corporations and other types of entities.
Social Security Number (SSN) for sole proprietors.
Bank Account Details:
Bank account information where we will transfer the funds.
Ownership and Control Information :
Information about the business owner(s) and major shareholders (typically those with 25% or more ownership).
This can include full legal names, addresses, dates of birth, and Social Security Numbers (SSN).
Personal Information of the Account Opener / Representative:
Full legal name.
Date of birth.
Home address.
Social Security Number (SSN) or Government ID.
If the account opener doesn´t have an SSN, make sure to have a government ID photo (front and back) in JPEG format.
Email address and phone number.
Website and Product Information:
A description of products or services offered (optional).
Website URL or an online presence where the business activities are visible.
Enable In-App Payments
To create an online payments account and enable in-app payments, do the following instructions:
Go to Setup and select Settings.
Click on In-App Payments from the Company Setup group of settings.
Click on Create Account. This will open a KYC page where you can add your company’s information.
Fill out your company or location’s account information.
Click on Save.
Multi-Location Companies
This integration is enabled on a location basis. You can find this setting in the Settings > Locations tab.
| Info |
|---|
Once you enable in-app payments, you can see the processed payments from the A/R > Payment History screen. |
Edit or Complete Account Information
To edit an online payments account or add missing account information, do the following instructions:
Go to Setup and select Settings.
Click on In-App Payments from the Company Setup group of settings.
Click on Add Missing Information. This will take you to the KYC page, where you can see the existing account information.
Modify or add the information.
Click on Save.
Multi-Location Companies
This integration is enabled on a location basis. You can find this setting in the Settings > Locations tab.
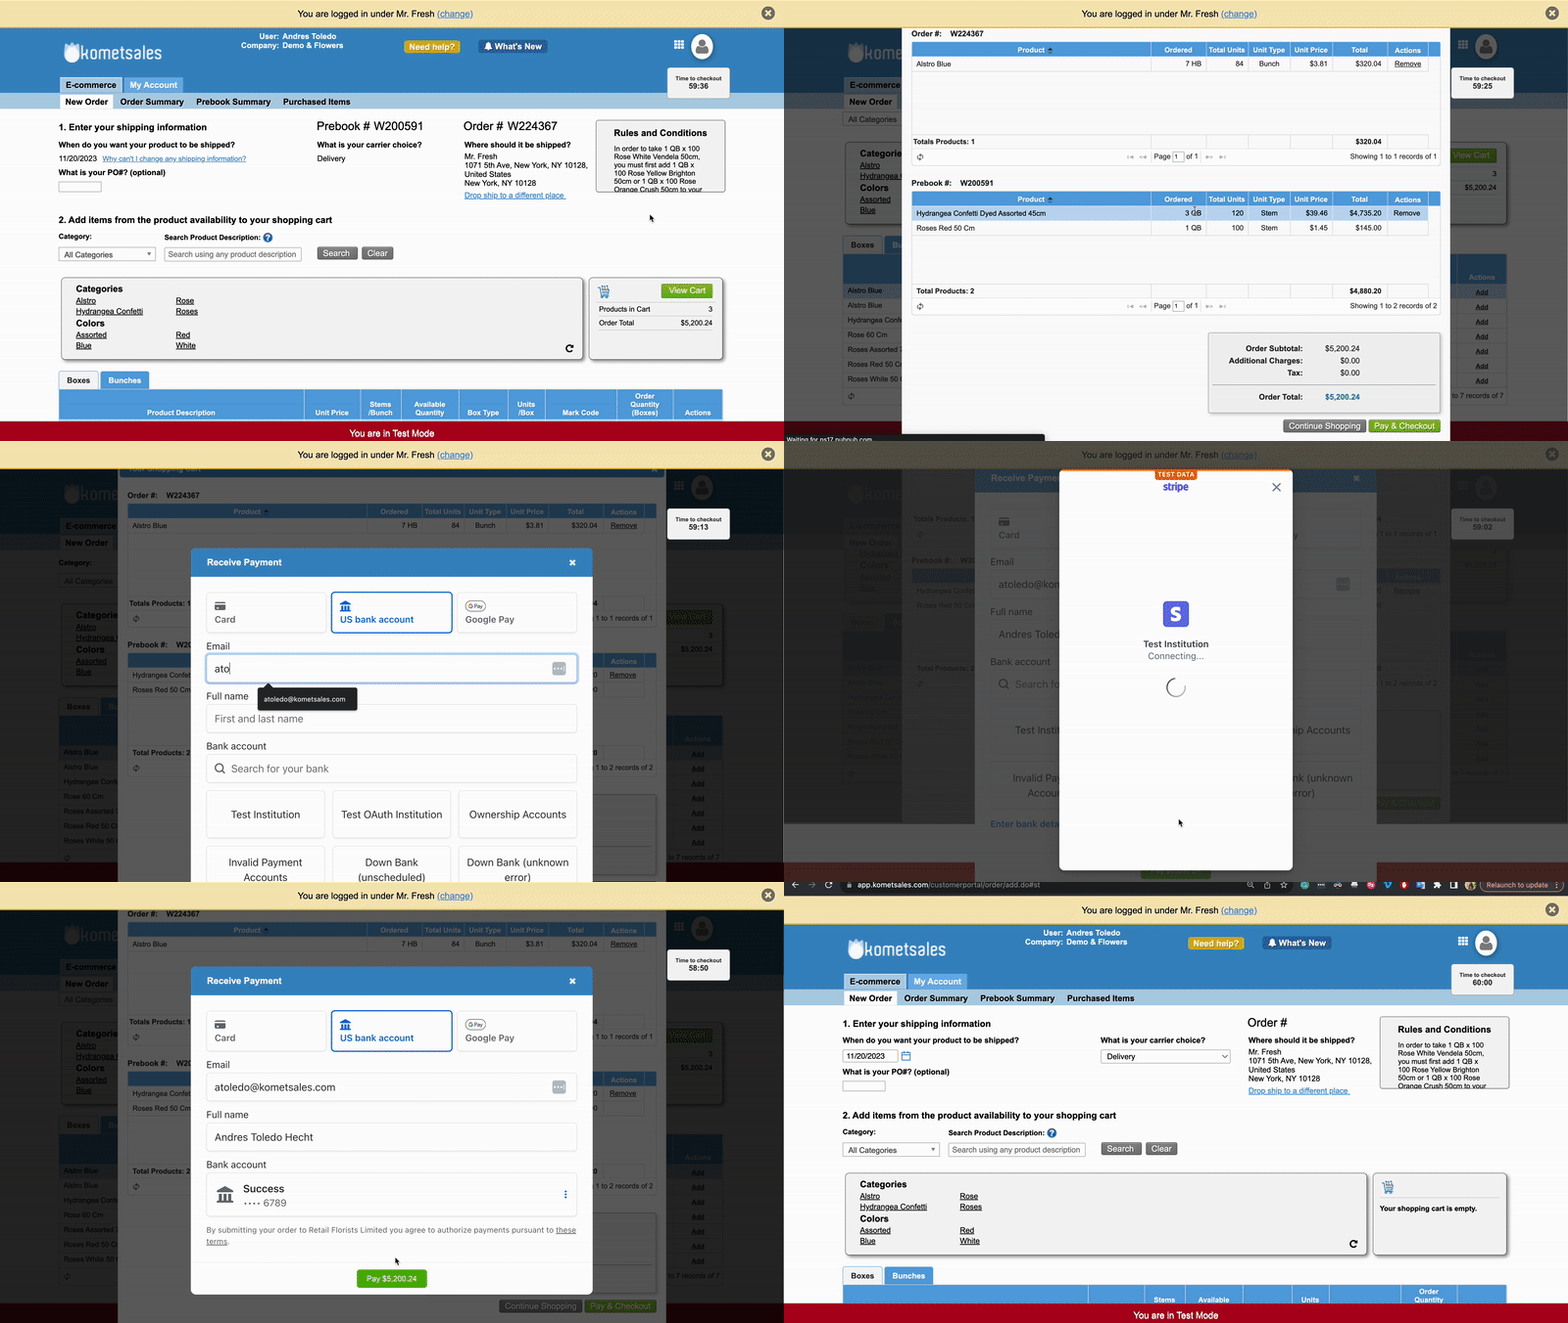
To make a payment directly in the E-Commerce when you checkout, do the following instructions:
Once you’ve finished adding your products to the cart, click on View Cart.
Click on Pay & Checkout.
Select if you are paying with a credit card or ACH.
Add the payment details and click on Pay.
To process payments in the accounts receivable module, do the following instructions:
Go to A/R and select Receive Payment.
Select the Customer.
Enter the amount and payment information and select ACH or Credit Card as a payment method.
Apply the payment and click on Pay & New.
Add the payment details and follow the instructions on the screen.
| Tip |
|---|
You can check the Save for future payments option to process future payments without having to input the payment details again. |
| Filter by label (Content by label) | ||||||||
|---|---|---|---|---|---|---|---|---|
|


