Versions Compared

Key

  • This line was added.
  • This line was removed.
  • Formatting was changed.

Overview

Excerpt

There are common actions users can perform while creating Prebooks such as adding a ship to, create Prebooks Lite, add items from Vendor Availability, edit the Prebook, etc.


Ui expand
titleAdding a ''New Ship To'' to a Prebook

Komet allows its users to add a new Ship To to a Prebook.  To do so, follow the steps bellow:

Ui steps
sizesmall
Ui step

Go to Prebook->Add Prebook.

Ui step

 Fill out the fields that are required for the Ship to field, click on the Select link and the pop-up window for Choose a Ship To, will appear.

Ui step

On this window, click on the Add a new ship to link, simply click on it and enter the information required.  Also in this window, there is the option to enable the Use for this Order Only feature.  This allows the user to enter a ship to that will not be stored under the Customer's Account, instead, it will only be used for that order. Make sure to select the right option when saving:

  • If you select Save & Use the Ship to just created will be used in the current order. 

  • If you Select Save & Close, the Ship to will be added to the Ship To's for the customer in Komet but it will not be used in the current order. 

  • When selecting the  Use for this Order Only feature, you will only have the options to select Save & Use or Close.


Info

Mandatory Selection of Ship To's

The user must select a Ship To when creating a Prebook for a customer that has more than one Ship To. The user may not continue with the order until a Ship To is selected. In addition, the user can "Change" or "Remove" the Ship To selected. Refer to Customer Settings for more information.

Image Modified

Ui expand
titleAdding Items From Future Inventory or Vendor Availability

You can create a Prebook based on future inventory or Vendor Availability. 

Ui steps
sizesmall
Ui step

Click on the Prebooks & SO’s tab and click on the “Add Prebooks” sub-tab.

Ui step

 Click on Add Future or Vendor Availability items.


Ui step

The future inventory screen will be displayed by default. You can filter your search by date or product name. Once you find the desired product, click on Add, in the Action column.

Ui step

 Enter the required fields. Notice you can add products both in units and boxes. Enter the number of boxes or units, the price, and click on Add.

Ui step

Once you do that, the item will be added to the order and you will be able to continue adding products. To add products from vendor availability, please click on the Vendor Availability tab, search for your products, enter the required fields and click on Add.


Info
iconfalse
titleImportant
  • Once you return to the Add Prebook menu, a letter will appear next to the product name. The F indicates a product selected from Future Sales and the indicates the product comes from Vendor availability. Image Modified
  • If the content within a box is partially sold in units, the remaining units will be available to be sold as units provided that the setting Bill Units as Boxes is disabled. 

Image Modified


Ui expand
titleCreating Prebooks Anywhere on the System (Prebooks Lite)

You can create Prebooks just by pressing Ctrl +E anywhere in the system. when the Sell By Units Setting is enabled, you will be able to create Prebooks both in units and boxes.

Image Modified

Info
titleRemember that:
  • Depending on what your role is, the system might suggest the Customer.
  • When a customer and a truck date is set up, the Carrier could be suggested.
  • When product lines created from this shortcut have the same location, customer, truck date, and carrier of a pre-existing Prebook, the system will add them to it.
  • The system will remember the tab you used for Prebook Lite creation. This means that if you create a Prebook in units using this option, the next time you press Crtl+E, the system will display theunitsprebookcreationtab by default.
Ui expand
titleEditing a Prebook
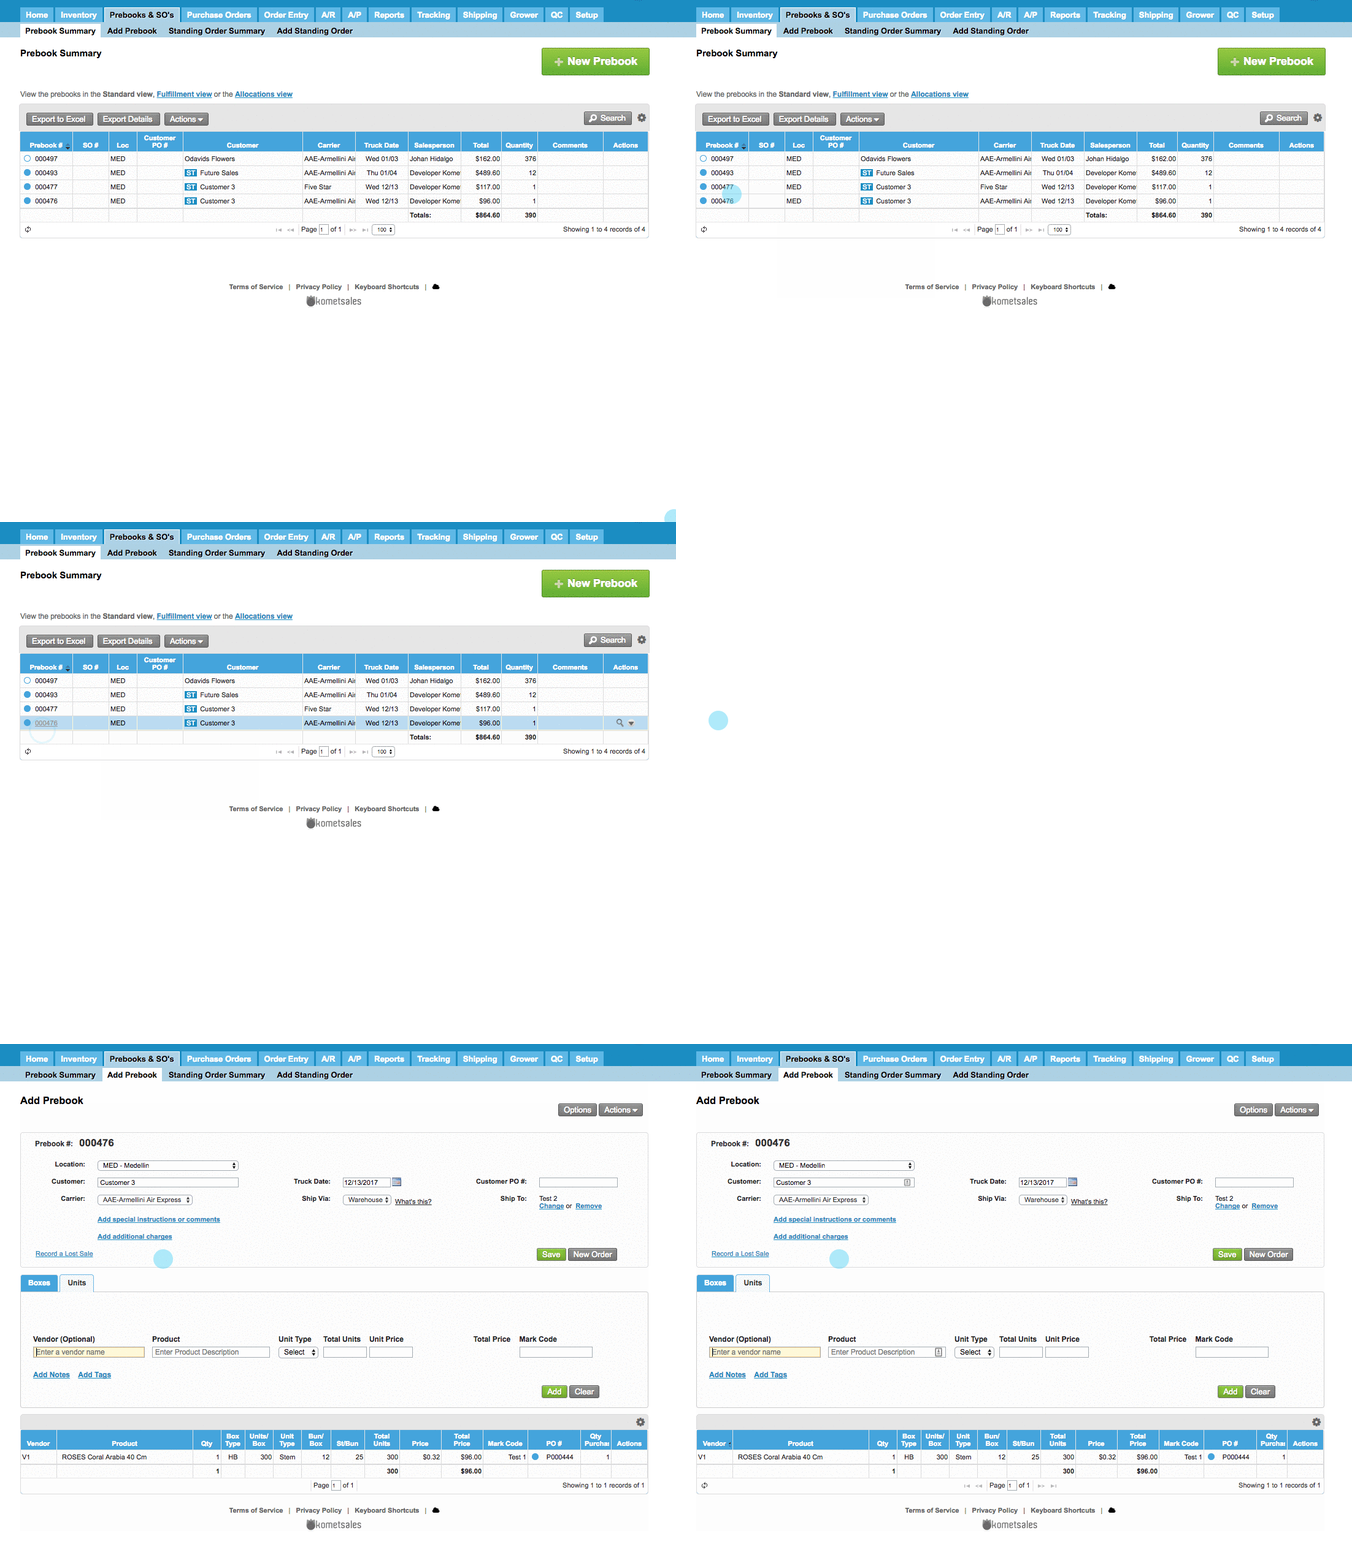
The system allows editing a Prebook (Unless the Prebook is already associated with a PO, in this case, the system will allow you to edit just the price).


Info
titleUseful Tip:

You can customize which columns will be displayed in the Add Prebook screen. Just click on the gear icon and check the information you want to see.

Image Modified


For editing a Prebook, follow the steps below:

Ui steps
sizesmall
Ui step

Go to Prebooks & SO's > Prebook Summary.


Ui step

Go to the Standard View.  


Ui step

 Click on Edit, in the Actions column for a particular Prebook.


Ui step

The system will display the Add Prebooks creen for the selected Prebook where you can edit the Prebook information. 

Info
titleImportant

If the Prebook is already associated with a PO the system will allow you to edit just the price. (For make an exception, activate the user setting Allow Price Changes on Purchased Items).

Image Added

Ui expand
titlePrebooks Read Indicator From the Standard View

The circle in the Standard View, next to the Prebook number allows you to identify when a Prebook line has been read by a buyer or user.

When you click on the search icon, next to the Actions drop-down menu, you will be able to see the Prebook order details. 

Image Removed

Notice the circle that appears next to the name of the user who read the order along with the date and time.

Image Added

Panel
titleRelated Articles


Filter by label (Content by label)
showLabelsfalse
max10
showSpacefalse
sorttitle
cqllabel in ("prebook-lite","prebook-vendor-availability","edit-prebook","ship-to")
labelsedit-prebook prebook-lite ship-to prebook-vendor-availability

Tip
titleEdit Prebooks From Prebook Summary

To edit a Prebook from the Prebook Summary, just click on the Prebook number, the system will open the Add Prebook screen and follow the steps described on Editing a Prebook.