| Anchor | ||||
|---|---|---|---|---|
|
| Excerpt | ||
|---|---|---|
In this article, you will learn how to enable and manage KometPayments to streamline your payment process and make your customers' lives easier.
|
Table of Contents
| Table of Contents | ||||||||||||
|---|---|---|---|---|---|---|---|---|---|---|---|---|
|
Setup
What Information Do I Need to Enable KometPayments?
To have an easy time creating a KometPayments account and enabling in-app payments in Komet, you will need to have the following information at hand:
Business Information:
Legal business name.
Type of business entity (e.g., corporation, LLC, sole proprietorship).
Industry type or nature of the business.
Business address and contact information.
Tax Information:
Employer Identification Number (EIN) for corporations and other types of entities.
Social Security Number (SSN) for sole proprietors.
Bank Account Details:
The bank account information where you will transfer the funds.
Ownership and Control Information :
Information about the business owner(s) and major shareholders (typically those with 25% or more ownership).
This can include full legal names, addresses, dates of birth, and Social Security Numbers (SSN).
Personal Information of the Account Opener / Representative:
Full legal name.
Date of birth.
Home address.
Social Security Number (SSN) or Government ID.
If the account opener doesn´t have an SSN, make sure to have a government ID photo (front and back) in JPEG format.
Email address and phone number.
Website and Product Information:
A description of products or services offered (optional).
Website URL or an online presence where the business activities are visible.
To create an online payments account and enable KometPayments, do the following instructions:
Go to Setup and select Settings.
Click on KometPayments from the Company Setup group of settings.
Click on Create Account. This will open a “Know Your Customer” (KYC) page where you can add your company’s information.
Fill out your company or location’s account information.
Click on Save.
When you enable KometPayments, you will be able to receive payments from the E-Commerce, Order Entry, and A/R screens.
Multi-Location Companies
This integration is enabled on a location basis. You can find this setting in the Settings > Locations tab.
.png?version=1&modificationDate=1709516216505&cacheVersion=1&api=v2&width=562)
| Info |
|---|
Once you enable KometPayments, you can see the processed payments from the A/R > Payment History screen. |
Edit or Complete Account Information
To edit an online payments account or add missing account information, do the following instructions:
Go to Setup and select Settings.
Click on KometPayments from the Company Setup group of settings.
Click on Add Missing Information. This will take you to the “Know Your Customer” (KYC) page, where you can see the existing account information.
Modify or add the information.
Click on Save.
Multi-Location Companies
This integration is enabled on a location basis. You can find this setting in the Settings > Locations tab.

Setup Credit Card Terminals
To add physical credit card terminals to KometPayments, you need to create a location. Terminal locations are separate from Komet locations and multi-location companies. Using locations for terminals helps you manage multiple readers across various sites and ensures they download the right regional configurations.
Step one: Create a Terminal Location
If you are using physical credit card terminals, do the following instructions to add them to your system:
Go to Setup and select Settings.
Click on Credit Card Terminals from the Company group of settings.
Click on Add Terminal Location. The terminal’s location must be inside of the US or the system will not be able to activate it.
Fill out the form and click on Save.
| Info |
|---|
For Multi-Location CompaniesCredit card terminals are managed per location from the Setup>Settings>Locations screen. |
Step two: Add Terminals
Once you have created a location for your terminals, do the following instructions to add your terminals to a location:
Go to Setup and select Settings.
Click on Credit Card Terminals from the Company group of settings.
Click on the location you want to use.
Click on Add Terminal.
Add the label and the Registration Code.
Click on Save.
Registration Code
To add a credit card terminal you will need the Registration/Pairing Code. If you don’t know how to get a registration code, read Access Settings from Stripe’s documentation.
| Info |
|---|
For Multi-Location CompaniesCredit card terminals are managed per location from the Setup>Settings>Locations screen. |
| Tip |
|---|
Once you’ve added a terminal, all you need to do to accept payments with it is select Terminal POS as payment method from the A/R and Order Entry screens, and selecting the terminal you are using for the payment. If you want to learn more about receiving payments, read Receive Payments. |
Additional Settings
If you want to customize your KometPayments account further, you can modify the settings described below.
Require and Restrict KometPayments
You can choose which customers can, must, or can’t use in-app payments from the customer setup. To do this, do the following instructions:
Go to Setup and select Customers.
Search the customer you are modifying and click on Edit from the Actions column.
Click on Advanced.
Enable or disable payments by selecting one of the following settings in the E-Commerce Settings:
Require KometPayments. This setting at the customer level will require that the specific customer pays in the e-commerce with KometPayments (either Card or ACH). The checkout-only button will be removed.
Restrict KometPayments. This setting at the customer level will disallow the specific customer pay in the e-commerce with KometPayments (either Card or ACH). The pay & checkout button will be removed.
Click on Save.
If no setting is selected, both the checkout and pay & checkout buttons will be available for the customer in the e-commerce.
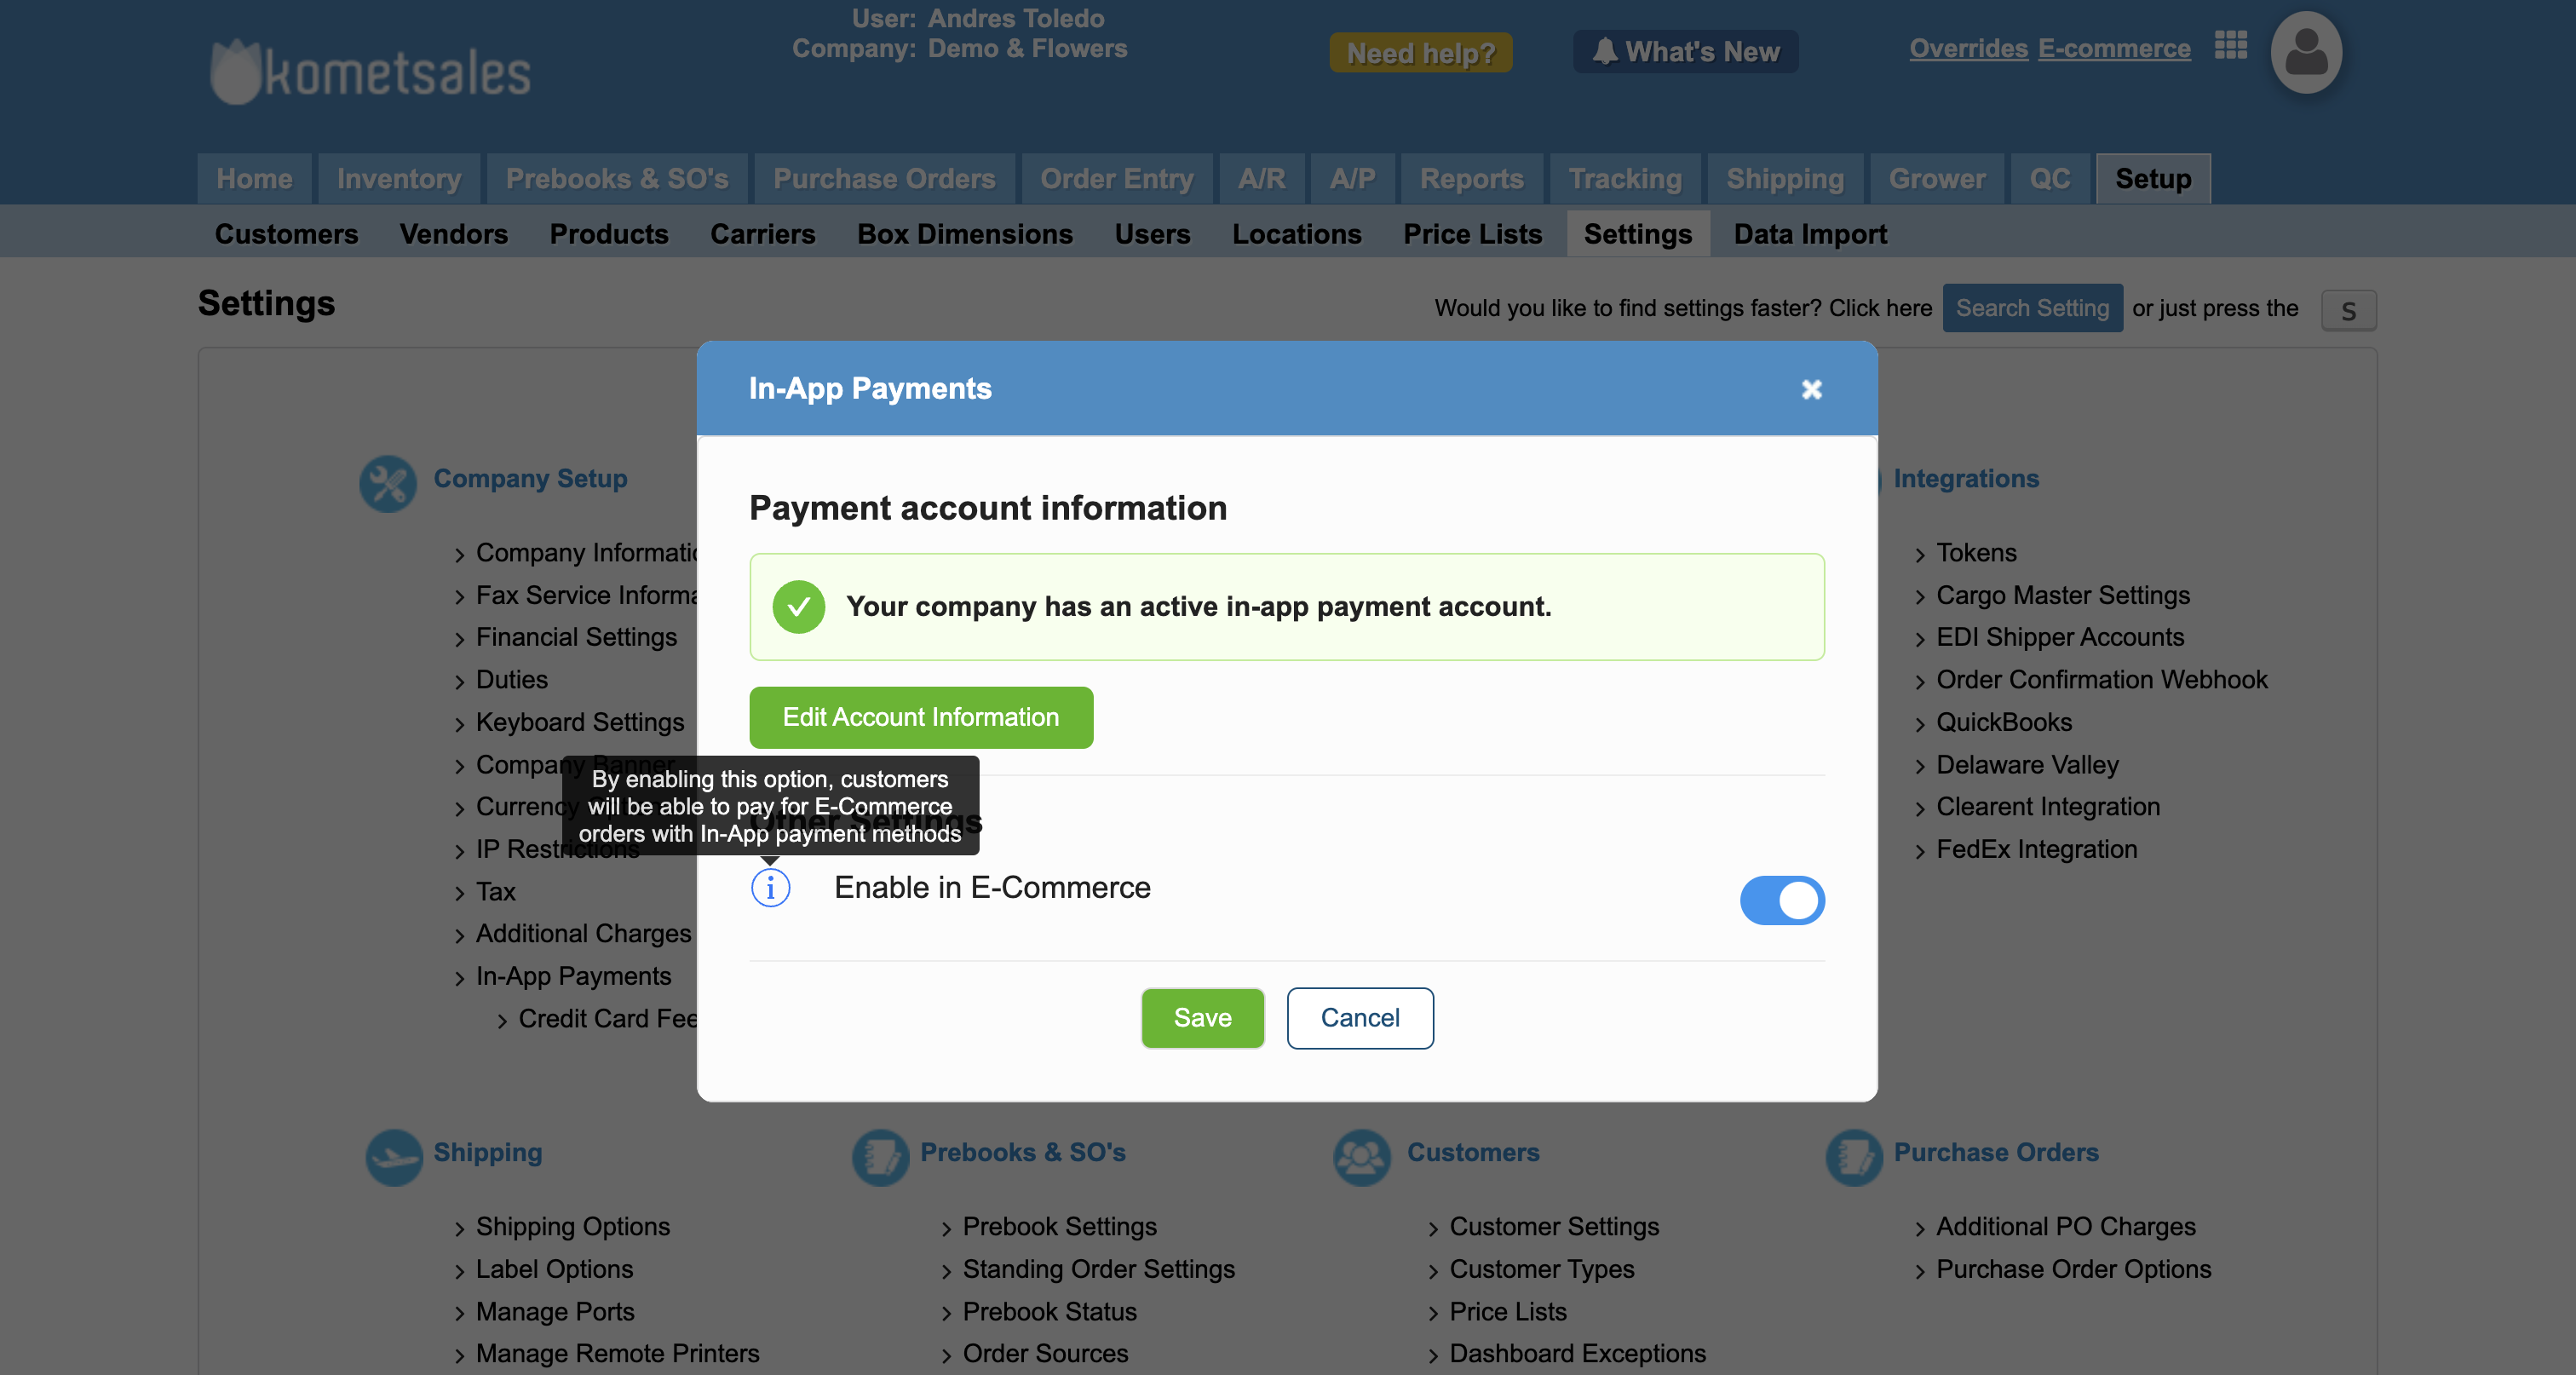
Enable in E-commerce
If you don’t want to accept payments in the E-Commerce, you can choose to deactivate them in the company settings.
To deactivate payments in E-Commerce, do the following instructions:
Go to Setup and select Settings.
Click on KometPayments from the Company Setup group of settings.
Uncheck the setting Enable in E-Commerce.
| Info |
|---|
By default this setting is enabled to accept payments in E-Commerce. |
Credit Card Convenience Fee
If you want to have a convenience fee applied to all credit card payments, you need to set it up from the settings, and then the system will automatically apply that amount to the total of orders paid with a credit card.
To set up the convenience fee, do the following instructions:
Go to Setup and select Settings.
Click on Credit Card Fee Set-Up from the Company Setup group of settings.
Select the type of fee you will be charging.
Enter the total fee amount the system will charge when processing payments.
Click on Save.

ACH Account Setup
First-time ACH payments
When a customer pays with an ACH account for the first time, KometPayments will send a micro-deposit email to the customer's email address. This email will contain a verification link to confirm the validity of the account. It may take 1-2 business days for the email to arrive. The customer must follow the instructions in the email to complete the verification process and continue with the ACH payment.
Until the verification process is complete, we will not process the payment in the system. However, the order will be checked out to ensure that it is not eliminated by the e-commerce timer. After the payment is submitted, we will show the message below to the customer to let them know that we have received the order, but the payment has not been fully processed yet.
Note that the payment will only appear in the payment history once the customer responds to the verification email. The customer will be prompted to enter a code from their bank statement when they click the verification link. Once the code is entered, the verification process will be complete.
| Info |
|---|
Failed ACH TransactionsWhen an ACH payment is still being processed, the system considers it as successful. This is because ACH payment failures are not very common. However, there are instances where a processing ACH payment may end up failing. In such cases, a special NSF (Non-Sufficient Funds) operation will be triggered automatically. This will create an invoice of $4.00 for the customer. |
Receiving Payments
Receiving Payments in A/R
To process payments in the accounts receivable module, do the following instructions:
Go to A/R and select Receive Payment.
Select the Customer.
Enter the amount and payment information and select ACH or Credit Card as a payment method.
Apply the payment and click on Pay & New.
Add the payment details and follow the instructions on the screen.
| Tip |
|---|
You can check the Save for future payments option to process future payments without having to input the payment details again. |
To process payments in the Order Entry module, do the following instructions:
Go to Order Entry and select Order Summary.
Search the order and click on Edit from the Actions column.
Click on Pay & Confirm.
Select ACH or Credit Card as a payment method.
Click on Pay.
Fill out the payment information and click on Pay to process the payment.
To make a payment directly in the E-Commerce when you checkout, do the following instructions:
Once you’ve finished adding your products to the cart, click on View Cart.
Click on Pay & Checkout.
Select if you are paying with a credit card or ACH.
Add the payment details and click on Pay.
| Info |
|---|
If you use Google or Apple pay, the system will also offer this payment methods when you select credit card as payment method. |
Request Payment Information
When you need a customer’s payment information, you can request it via Komet Sales. This is the most secure way to gather and store customer payment information.
To request a customer’s payment information, do the following instructions:
Go to Setup and select Customers.
Search the customer.
Click on Edit from the Actions column.
Click on the Payments Methods tab.
Click on Request payment method.
Enter the recipient’s email and click on Send form.
After you send this form, your customer will receive an email with a secure link where they can enter their payment information.
| Info |
|---|
The link your customer receives to add their information expires in four hours. |
If you want to review the payments you’ve received through Komet Sales, you can download a Settlements Report (Deposit Detail Report) that includes all the payments you’ve received, including details such as payment date, fees, reference numbers, etc.
To create this report, do the following instructions:
Go to Reports.
Select KometPayments Reports.
Select the Date Range. The maximum period for this report is 31 days.
Click on Settlements Report.
Enter the email address where the system will send the report and click on Save.
The system will generate the report in an Excel file and send it via email to the recipients you specified.


Upon activation of KometPayments within your company, a dedicated tab will automatically appear within the Accounts Receivable (A/R) menu. This tab, labeled "KometPayments," provides comprehensive insights into payments received through the KometPayments platform.
The total payment amount displayed includes the processing fee, if you want to see the total amount you’ll receive in your bank, you can check the Net amount in the payment details.
If you click a specific line, you will see the details of that payment, including a timeline and the processing fee your company is charging. You can also export payment reports from this screen.
| Info |
|---|
You can identify receipts from KometPayments in the A/R Payment History screen in the check reference column for transactions with an ID starting with the letter S. |
Refunds
You can issue full refunds directly in the payment history or partial refunds with creditsPayment History screen.
Timelines:
ACH: Up to 180 days from the original transaction.
Credit Cards: Up to 90 days from the original transaction.
Customer Impact: The refunded amount may take up to 10 business days to appear in the customer's bank account.
Refund Email: Don't worry, even though the money takes time to arrive, your customer will receive an email notification as soon as you initiate the refund. This way, they'll know to keep an eye out for it!
| Info |
|---|
If you want to learn how to process a refund, read Process a Refund for a Credit Card payment. |
FAQs
There may be some questions regarding Komet Payments. To resolve the most common ones, go to https://kometsales.atlassian.net/wiki/spaces/KB/pages/edit-v2/423755783?draftShareId=14ddf5c4-493e-4f3c-b2a5-27fb77bb1c40.
| Filter by label (Content by label) | ||||||||
|---|---|---|---|---|---|---|---|---|
|