Overview
| Excerpt |
|---|
The system allows procurement users to change allocations from the Bulk Purchasing Mode. This article explains how this option works. |
| Info | ||
|---|---|---|
| ||
|
Instructions to Reallocate Items
| Ui steps | ||||||||||||
|---|---|---|---|---|---|---|---|---|---|---|---|---|
| ||||||||||||
|

How to Delete an Allocation
This option is allowed for items either in boxes and units. To delete an allocation, follow the previous instructions and in the Current Allocations sections, go to the Actions column and click on Delete. A confirmation will appear, and once you click on Yes, Continue, the system will ask you if you want to delete the items also from the Prebook.
| Info | ||
|---|---|---|
| ||
If the Prebook items are associated to another PO, the system will reduce the quantities of the Prebook. |
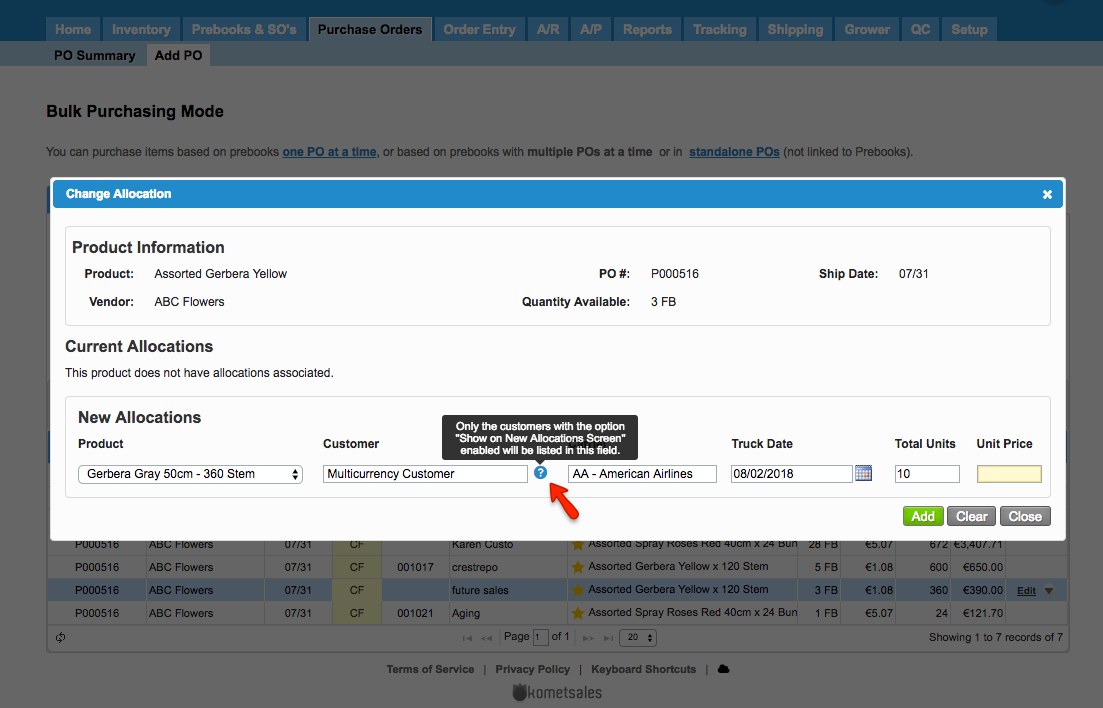
How to Perform New Allocations
| Info | ||
|---|---|---|
| ||
If the settings |
The system also allows to perform allocations from the same screen provided that there are still units available to assign to another Prebook. To do so, go to the New Allocations section and enter the information of the Prebook click on Add once you're done. The system will add the line to an existing Prebook with the same information or will create a new one.
The system will only list the customers with the setting Show on New Allocation screen enabled.
| Panel | ||||||||||||
|---|---|---|---|---|---|---|---|---|---|---|---|---|
| ||||||||||||
|
| Ui text box | ||
|---|---|---|
| ||
|
...