| Anchor | ||||
|---|---|---|---|---|
|
| Excerpt | ||
|---|---|---|
Komet Sales allows you to connect with DWF Wholesale, so your inventory is automatically sent to DWF, and you can start receiving orders directly from their system into Komet Sales. If you want to have this option enabled, please contact us.
|
| Info |
|---|
Orders created through the API are subject to a transaction fee based on the total order amount. |
Table of Contents
| Table of Contents | ||||||||
|---|---|---|---|---|---|---|---|---|
|
How does this Integration work?
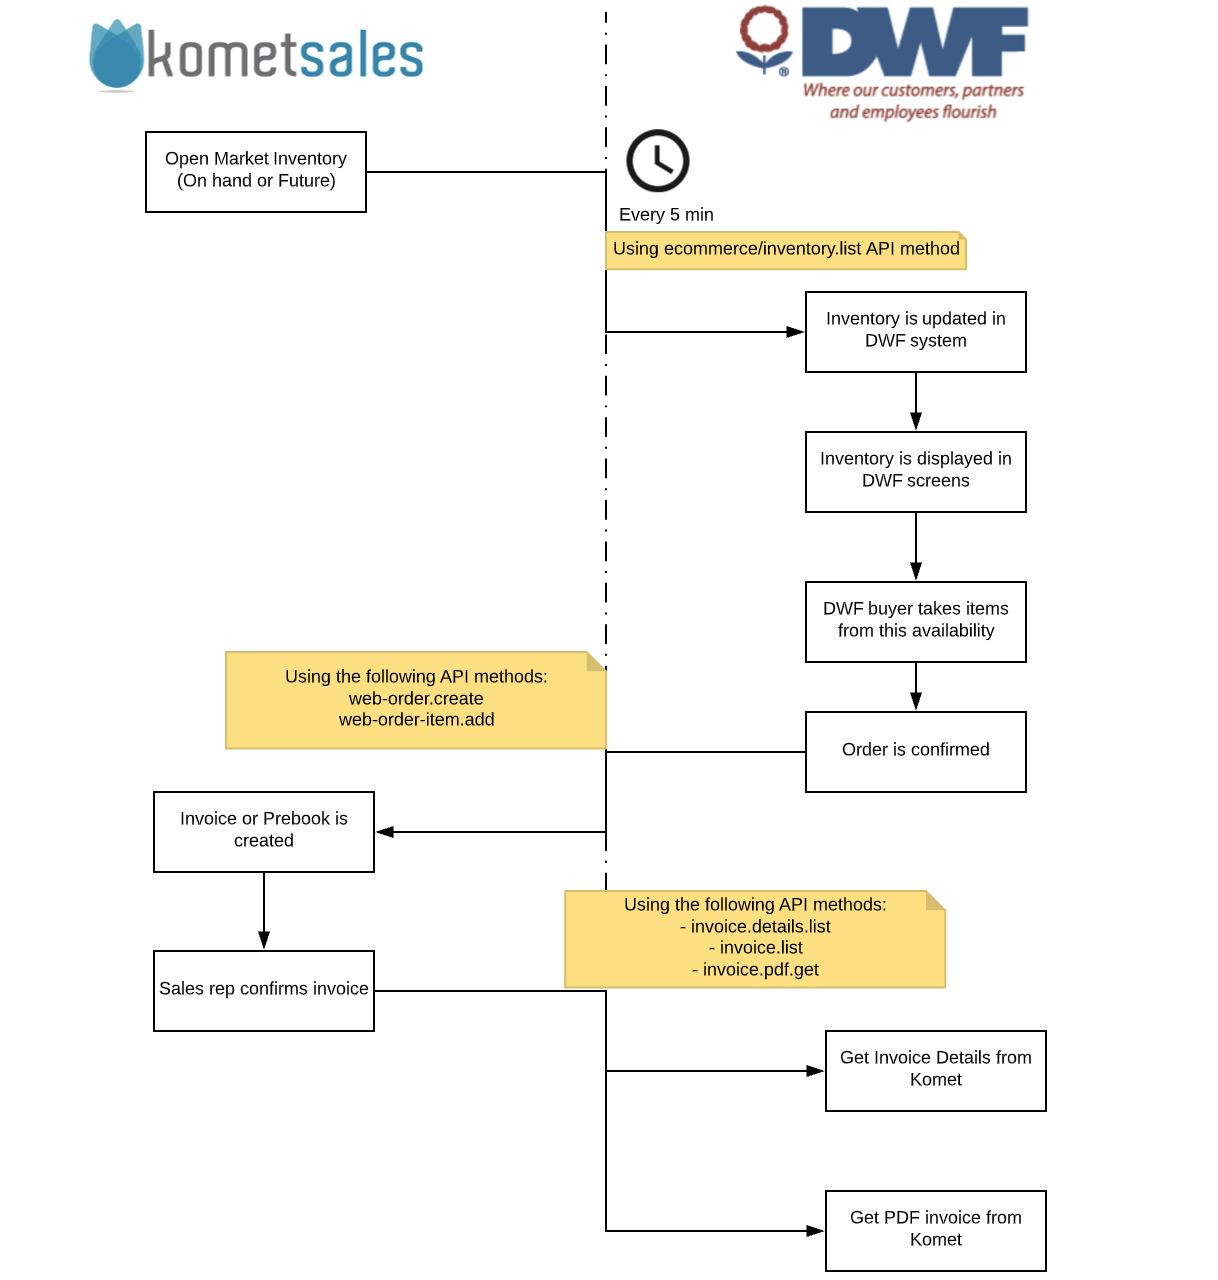
Using some of the available API methods, you, as a Company that uses Komet Sales, will be able to synchronize your Open Market inventory (On-Hand or Future) with the DWF system. Once an order is placed in DWF with one of your products, a Prebook or Invoice will automatically be created in your Komet account.
You have open market inventory available to be sold to your DWF customer.
Your inventory will be synchronized and sent to the DWF system every 5 minutes.
The final customer buys products from the DWF website.
Once the final customer checks out the order, the system will create a Prebook or an Invoice in your Komet account.
Your sales rep proceeds to confirm the order.
The inventory synchronizes every 5 minutes on the DWF website, so it is possible that inventory that does not exist anymore in Komet still appears in DWF.
How to set up the Integration?
You must set up this Integration in five steps:
Create the Customer and Vendor Tokens for DWF.
Get the DWF Customer ID.
Get your Company ID.
Get the Location ID. This only applies to Multi-Location Companies.
Send all this information to DWF so they can finish the setup on their system.
You'll find detailed instructions for each step below.
Step one: Create the Tokens for DWF
To enable this Integration, you must create a Customer Token and a Vendor Token. To generate the tokens for DWF, do the following instructions:
Step one: Create the Customer Token
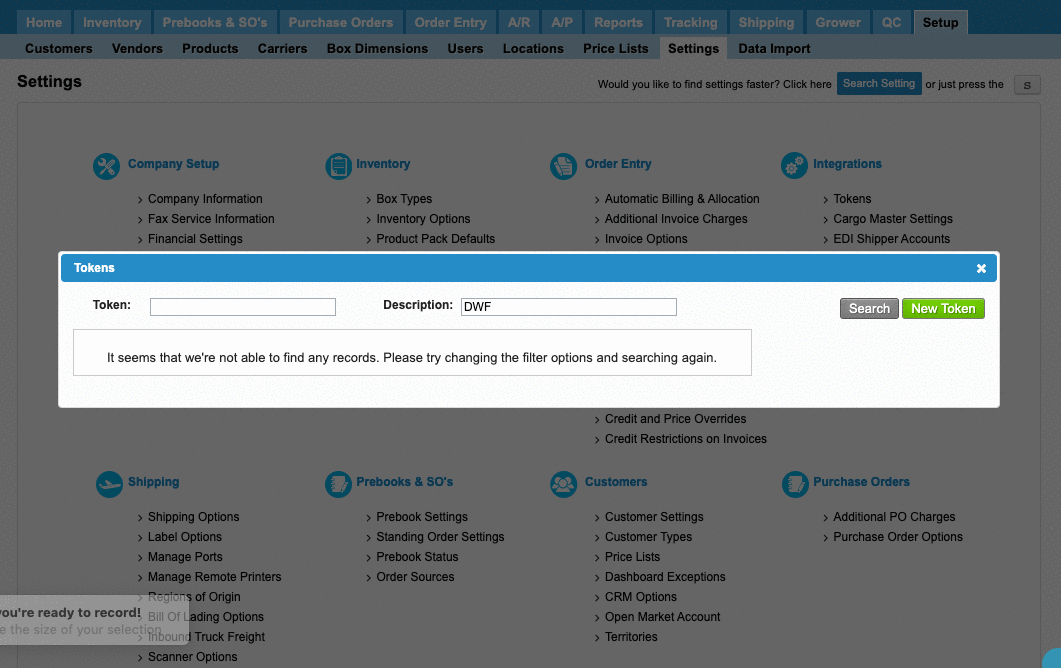
Go to Setup and select Settings.
Click on Tokens in the Integrations group.
Click on New Token.
Select Customer in the Token Type dropdown menu.
Add the token description.
Enable access to the following methods:
Click on Generate to create the token.
Copy the token.
Click on Save.
Step two: Create the Vendor Token
Go to Setup and select Settings.
Click on Tokens in the Integrations group.
Click on New Token.
Select Vendor in the Token Type dropdown menu.
Add the token description.
Enable access to the following methods:
Click on Generate to create the token.
Copy the token.
Click on Save.
| Info |
|---|
For this step, your vendor can also create its own token. To learn how, read Create a Vendor Token from the Vendor Portal. |
Step two: Get the DWF Customer ID
DWF needs the Customer ID that represents DWF in your account. To get this ID, do the following instructions:
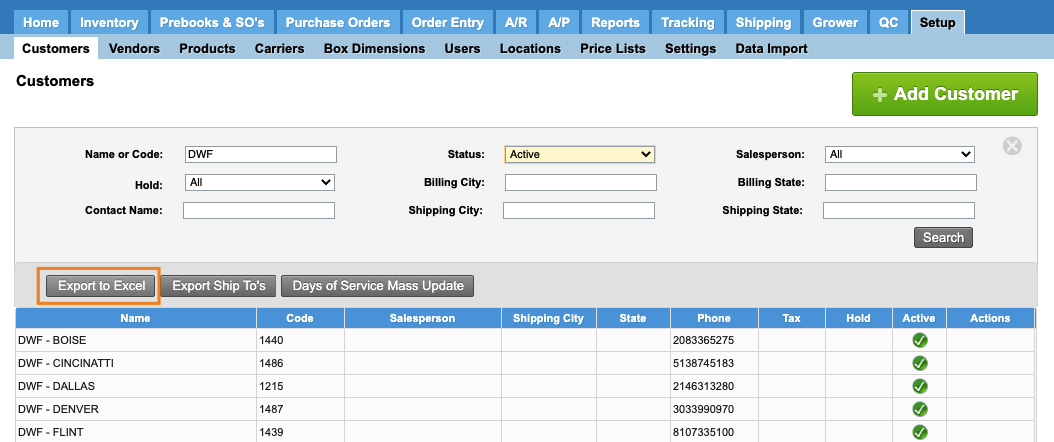
Go to Setup and select Customers.
Search the DWF Customer.
Click on Export to Excel.
Open the Excel file. Your Customer ID is in the Id column.
Step three: Get your Company ID
DWF also needs to know the Company ID representing your Company in the Komet Sales Network. Click on the screen's avatar icon at the top right and select My Profile to get this number.
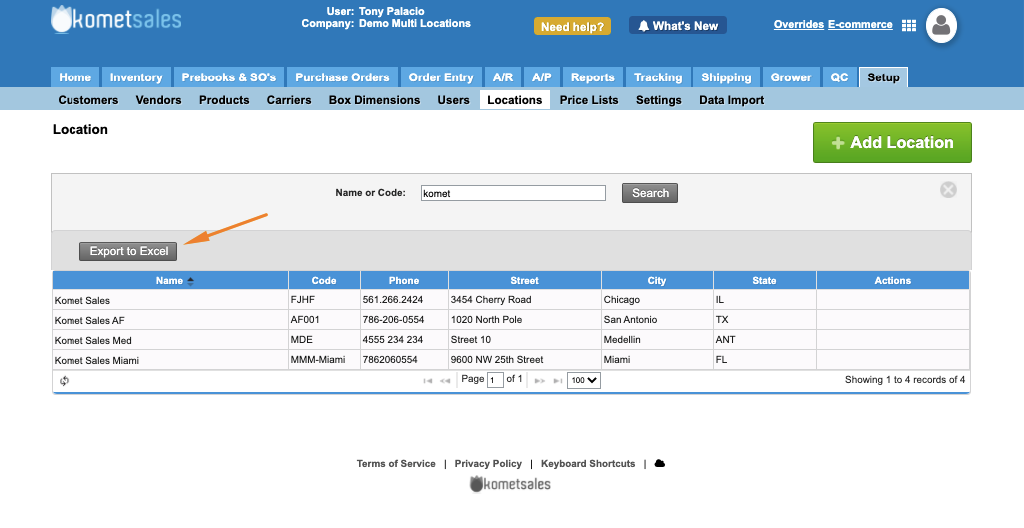
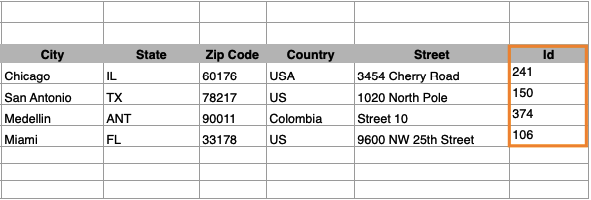
Step four: Get the Location ID (Only for Multi-Location Companies)
DWF needs the location ID of the locations associated with the customer that represents DWF in your account. To get these IDs, do the following instructions:
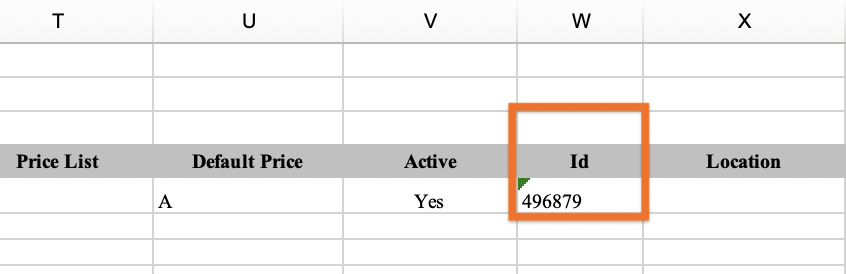
Go to Setup and select Locations.
Click on Export to Excel.
Copy the IDs in the Id column of the Excel file.
Step five: Send this information to DWF
Proceed to send the Customer Token, the Customer ID, and the Company ID to the DWF team so they can finish setting up the Integration on their system.
| Filter by label (Content by label) | ||||||||||
|---|---|---|---|---|---|---|---|---|---|---|
|