Versions Compared

Key

  • This line was added.
  • This line was removed.
  • Formatting was changed.


Excerpt

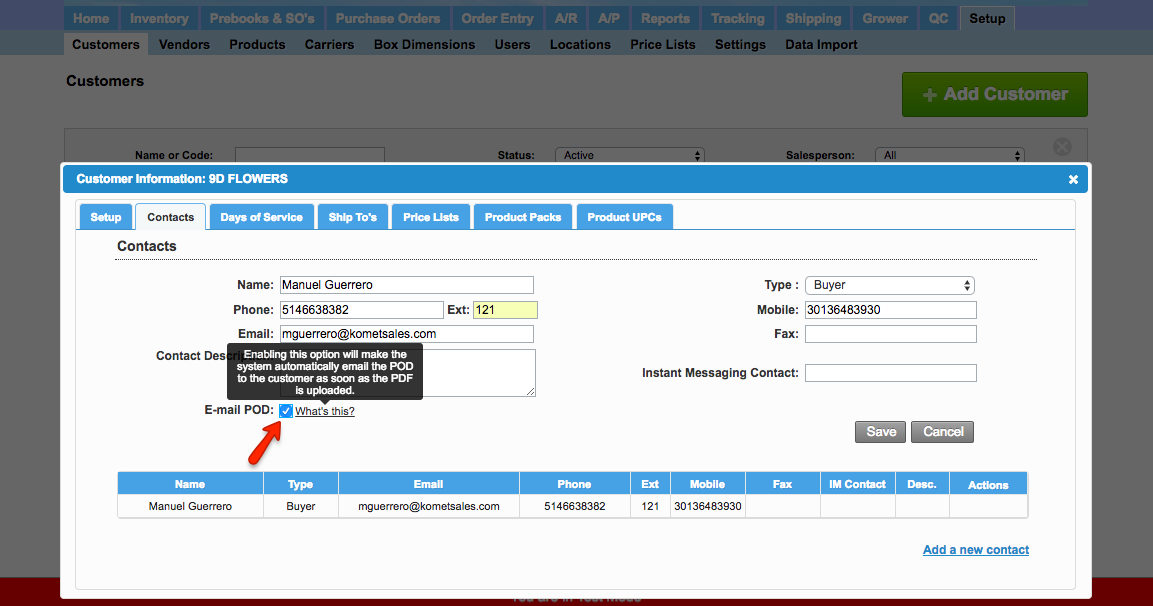
The system allows you to save as many contacts as needed for each customer account. 


Instructions

To add a new contact please follow these steps:

Ui steps
sizesmall


Ui step

Go to Setup > Customers (or double click on a customer name anywhere in the system).


Ui step

 Search for the customer that you want to add the contacts to.


Ui step

 Click on the Edit option, within the "Actions" column. This will open the customer details window.


Ui step

 Click on the Contacts tab and click on "Add a new contact". If you want to Edit or Delete an existing contact the options will be under the "Actions" column.


Ui step

 Enter the contact information.


Ui step

 Click on the "Save" button.


Within the "Type" field you will have three options:

  • None: This person is not involved in buying or paying (e.g.: General Manager).
  • Buyer: This person will appear as a buyer option when creating an invoice. This is useful when selling to companies with multiple buyers to keep track of the person that made the purchased. This email will be used when emailing the invoice and the buyer has assigned that invoice.
  • A/P: This person will be used as the default contact for accounts payable. They will not receive a copy of the statement email, the invoice will be sent to the emails configured in the "Send Invoice To" field in the Customer Information > Setup.


Email POD (Proof of Delivery)

This option can be enabled for each contact. By enabling this option, the system will automatically send an email of the POD to the customer once the POD PDF file is uploaded to the system.


Panel
titleRelated Articles

Filter by label (Content by label)
showLabelsfalse
showSpacefalse
cqllabel = "customer-setup"
labelscustomer-setup


We've encountered an issue exporting this macro. Please try exporting this page again later.